My parallactic mount - Skywatcher EQ6
| Frameless version of this page |
In March 2004 I purchased a parallactic mount - Skywatcher EQ6. The mount consists of the tripod and the equatorial head. Inside the equatorial head the motor electronic, the two stepper motors and the gear for the traking are located. An illuminated polar finder scope is mounted inside the hour axis. For the balanced move of my 10 Inch Newton telescope with every possible setup I had to buy additional four counterweights with 4.5 kilogram each.
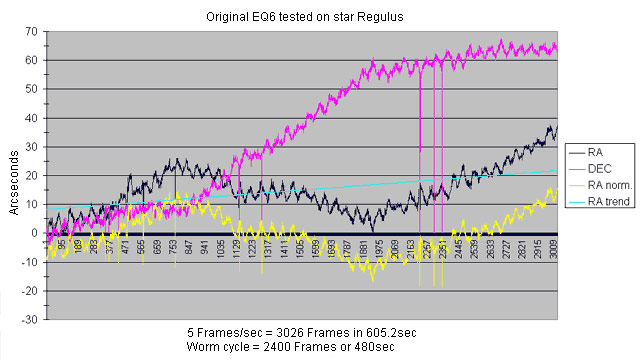
The mount had a simple handcontroller for both axis with velocities 2x, 8x and 16x. Because the periodic error of the worm gear of this EQ6 mount had only the relativ small value of +/-12 arcseconds and the change was smooth I did no changes on bearing and gear. In this design I worked with the EQ6 over some years and in several hundreds of hours without problems.
 |
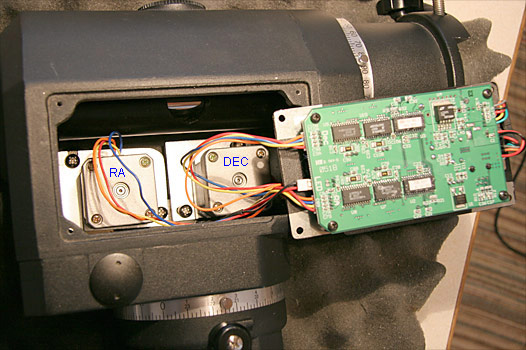
In December 2006 a major modification was done on my EQ6. I purchased a Synta Upgrade Kit for the EQ6. Since then new motor electronics with new stronger and faster stepper motors makes movements up to 800x possible. For Goto controll I use the new SynScan handcontroller with about 14.000 objects stored inside. But additionally controlling and autoguiding direct from a PC or update from internet is possible now.
| The new motorelectronics with stronger and faster stepper motors |
 |
For the numerous users of the Synta EQ6 mount worldwide a special Yahoo Group EQ6 http://groups.yahoo.com/group/EQ6 for experience exchange was started in the year 2001. There one can find many valuable advices and gets fast answers about EQ6 specific questions from other users.
Since November 2006 additional the Yahoo Group EQMOD http://groups.yahoo.com/group/EQMOD dealing with the direct controlling of an EQ6 from a PC exists. In this group because of the cooperation of some very commited programmers and numerous users powerful and practical software packages for EQ6 controlling are developed continuous. This excellent software packages can be loaded from the server and used for free.
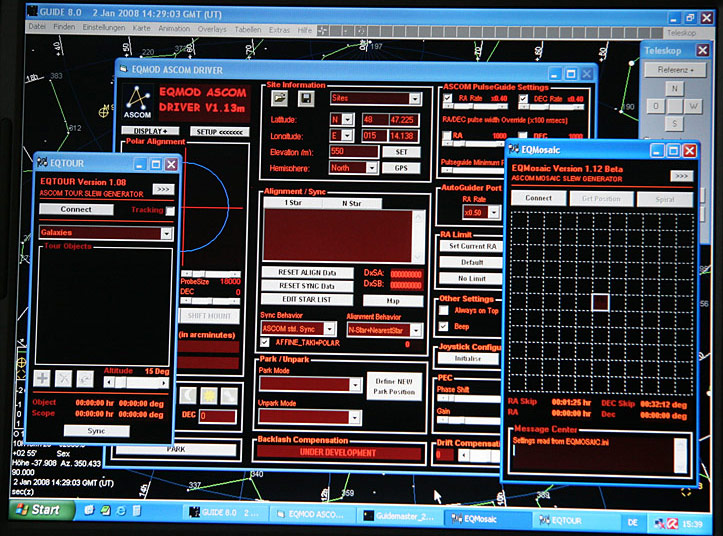
EQMOD ASCOM Driver - pulsguiding over ASCOM by any software and many extras
EQMOD MOSAIC       - controlling software for mosaic imaging of a big object
EQMOD TOUR         - automatic procedur of positioning on before defined objects
EQMOD EQMODLX      - translation of LX200 commands for satellite tracking in realtime
EQMOD PERECORDER   - recording of the periodic error of the worm gear for later compensation
The RS232/TTL EQDirect adapter therefor needed can be bought or selfmade relativ simple. With this little adapter of few Euro for the EQ6 mount many additional and high-quality applications can be used. Here you can load a Schematic of the EQDirect adapter for self made.
Internet page with overview about the EQMOD project
http://eq-mod.sourceforge.net/
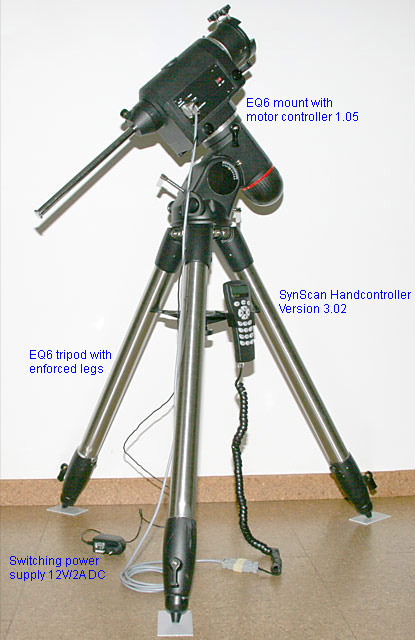
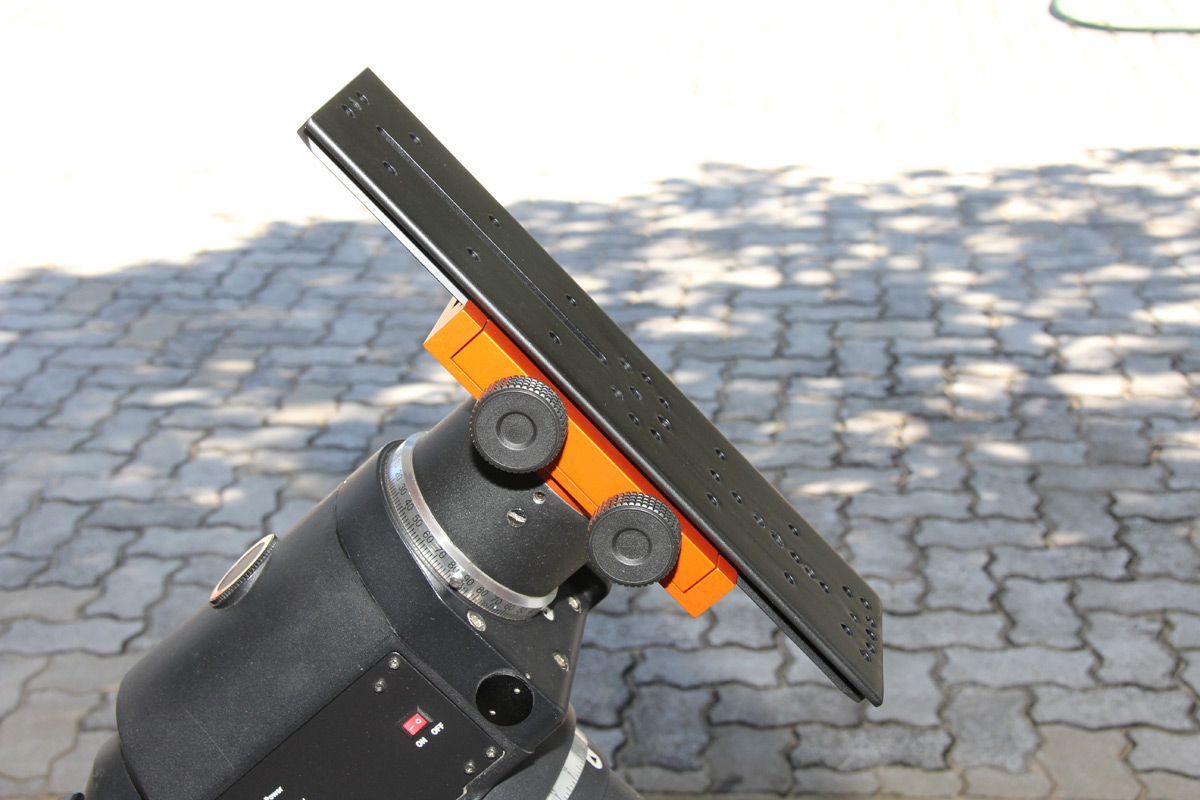
| The EQ6 can be operated with the handcontroller or with a PC serial over an EQDirect adapter | |
 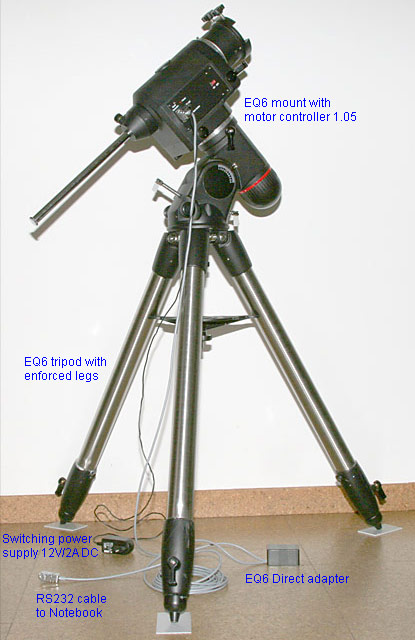 | |
| The EQ6 can be controlled from notebook or wireless | |
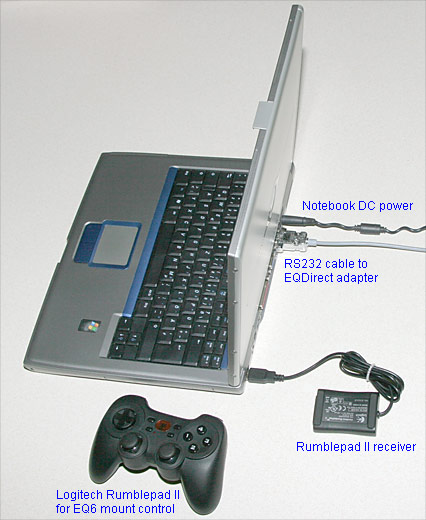 | |
| Many powerful programs can run on a notebook and control the EQ6 over ASCOM | |
 | |
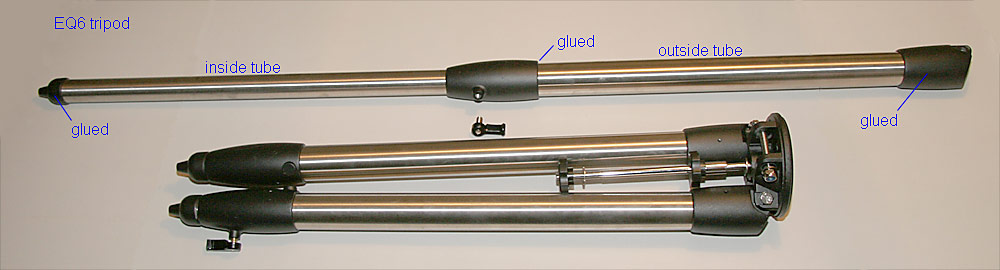
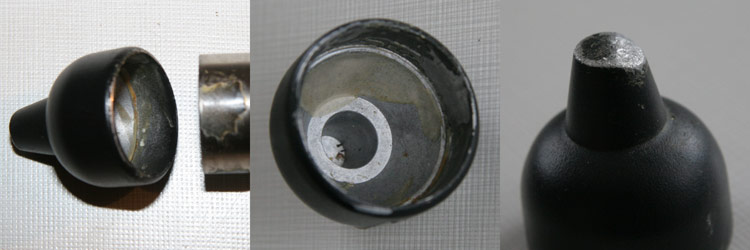
EQ6 Tripod - modification and reinforcement of inner tubes
Because of my 10 Inch Newton and the auxiliary equipment there is a relative high weight-loading on the EQ6 and the tripod legs. With the mount weight included very often about 60 kilogramms can push on the EQ6 tripod. So I had to fix the inner legs with the levers very strong. After two years I could not move two of the three inner legs anymore. Obviously the inner tubes were deformed by the strong tightened levers. So I could not use the inner legs for leveling the mount. From now on wooden plates with different thickness were used to lever the mount.
The dismounting of the tripod legs is not very easy. Because on every tripod leg there are three glued metal parts. This glued connections can only be loosen by hits or by heating. But before this one can never know how much glue was put inside the tubes during production. In my three legs there were big differences in the amounts of glue. So I had also big differences to loose the connections.
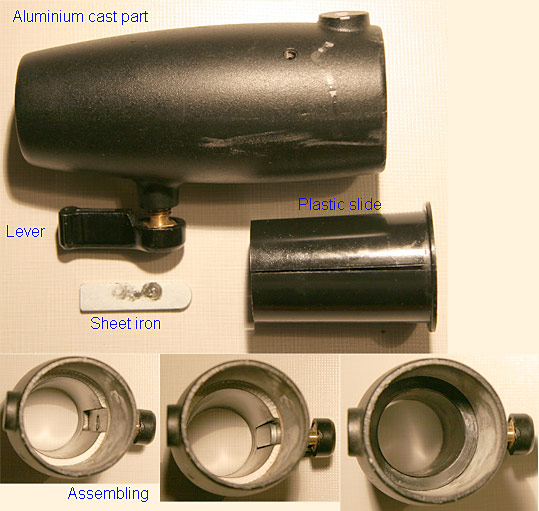
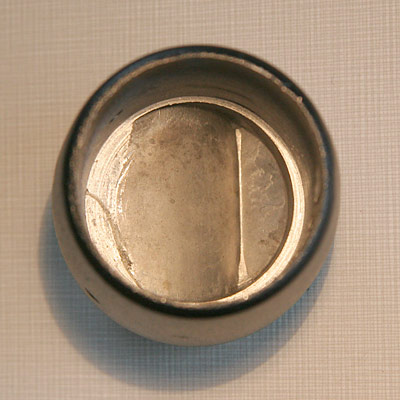
| On every tripod leg there are three aluminium cast parts glued with the stainless steel tubes. |
 |
But if as it was in my tripod the inner tube is blocked at the middle aluminium part this middle part has to be loosen from the bigger tube. Because on this place there is a plastic slide inside one cannot heat the part to loose the glue. The plastic slide inside would melt and would be destroyed. So mechanical hits have to break away the glue connection between the bigger tube and the aluminium cast part. But before this alwyas loose the Allan screws on the aluminium part.
| Strong hits are done with a hammer and wooden pieces parallel to the tube on the edge of the cast part. |
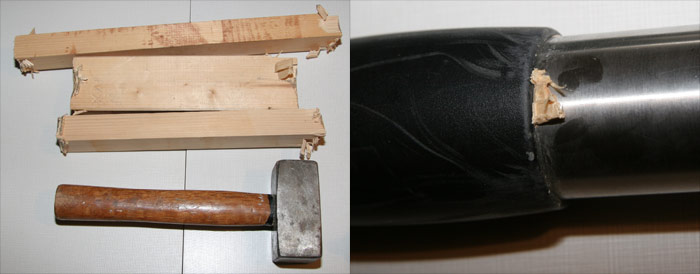 |
On my tripod only one of the three tubes could be loosen easy. On the other two tubes much glue fixed the parts very strong and I had to use a bench vice and very strong hits to loose the glued points. This working leaved some scratches on the aluminium parts and the thick tubes.
| The inner tripod tube is inserted on the wider end of the aluminium cast part |
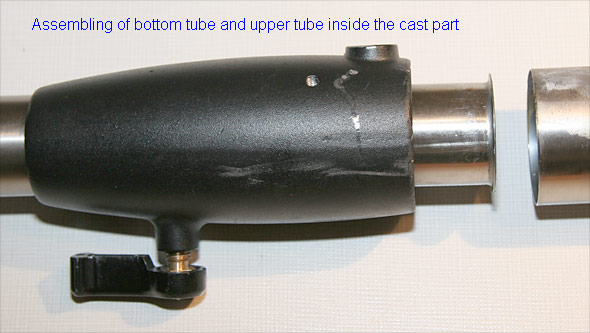 |
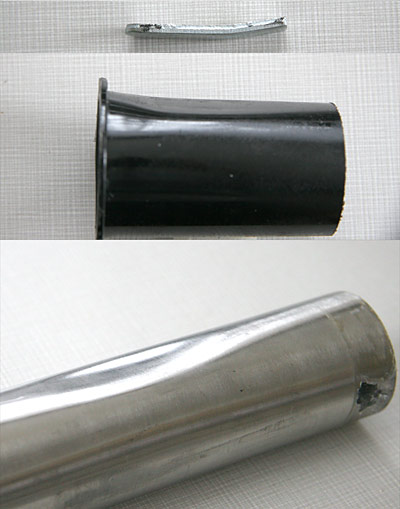
After the dismounting it was clear why the inner tubes did not move anymore. The sheet iron, the plastic slide and the tube were permanently deformed by the fixing lever. So never mind if the lever was tightened or not, the tubes were blocked permanently.
| The parts for fixation of inner tripod legs are deformed |
 |
| The assembling of the parts for clamping the inner tripod tubes |
 |
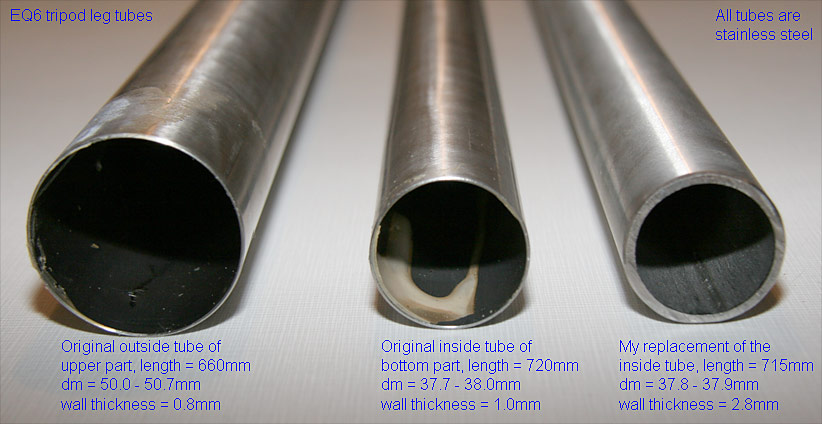
So the problem was the thin wall of the inner tubes. I replaced this tubes with new stainless steel tubes with much more wall thickness. Because of this new stronger tubes the weight of the tripod rised by 40 percent from 7.7 kilogram to 10.8 kilogram. But the new lower placed balance point rised also the stability of the system.
| The stainless steel tubes of the tripod legs in comparison |
 |
| The ground caps are also fixed with glue on the lower tube end |
 |
| The aluminium part on the higher end of the tripod leg is put on the tube and glued |
 |
| Inside view of the upper aluminium part |
 |
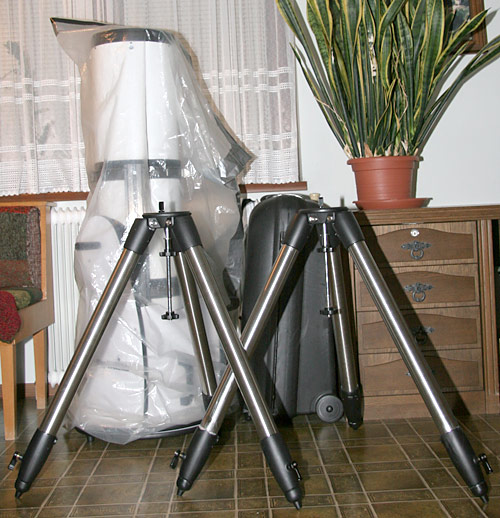
| Two tripods for the EQ6, one original and one enforced |
 |
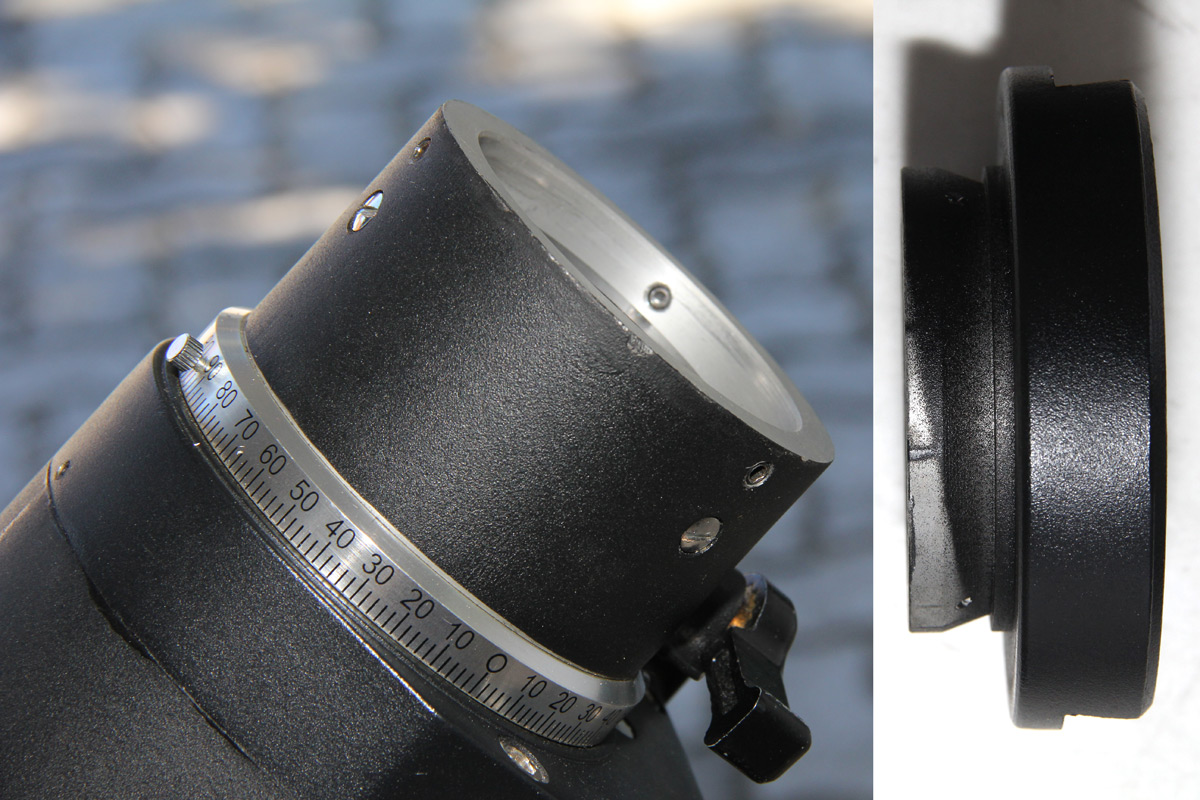
| Until July, 2013 the original dove tail clamp for GP dovetails was mounted on the EQ6 |
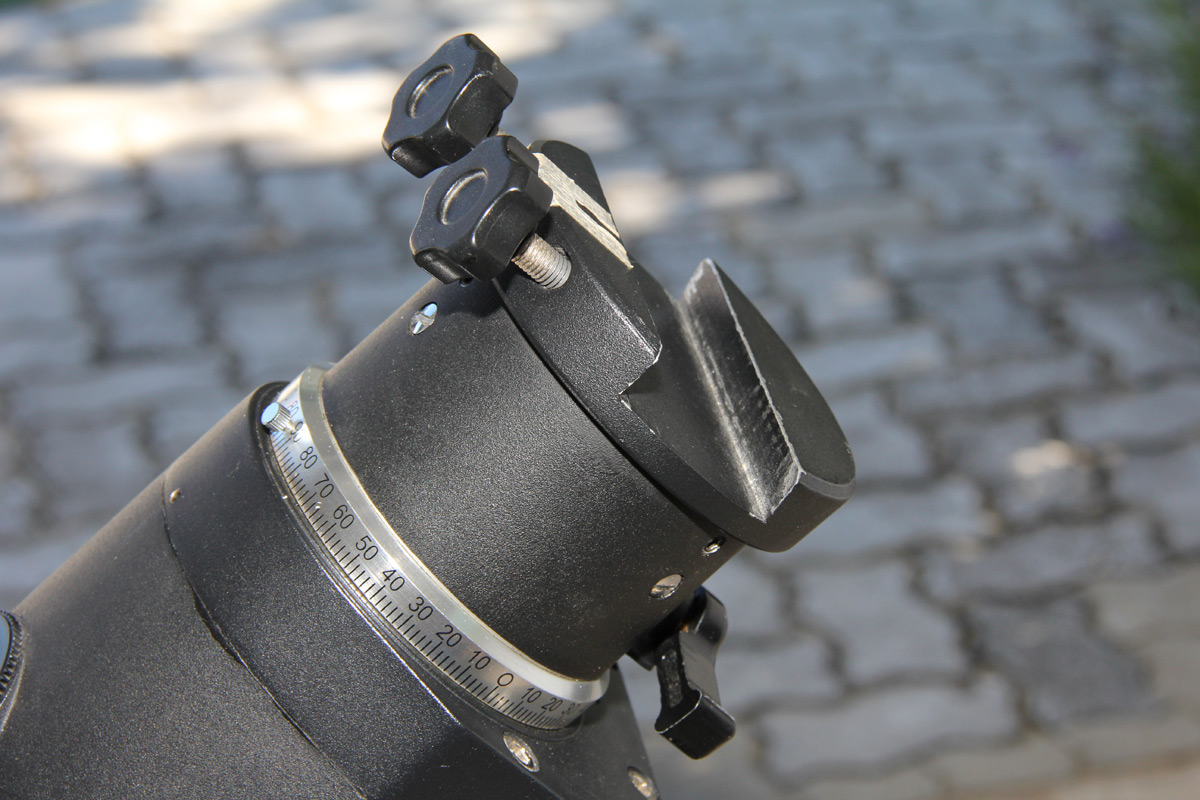 |
| Original dove tail clamp for GP dovetails on EQ6 |
 |
| In July, 2013 a new dove tail clamp for GP and for Losmandy dovetails was mounted on the EQ6 |
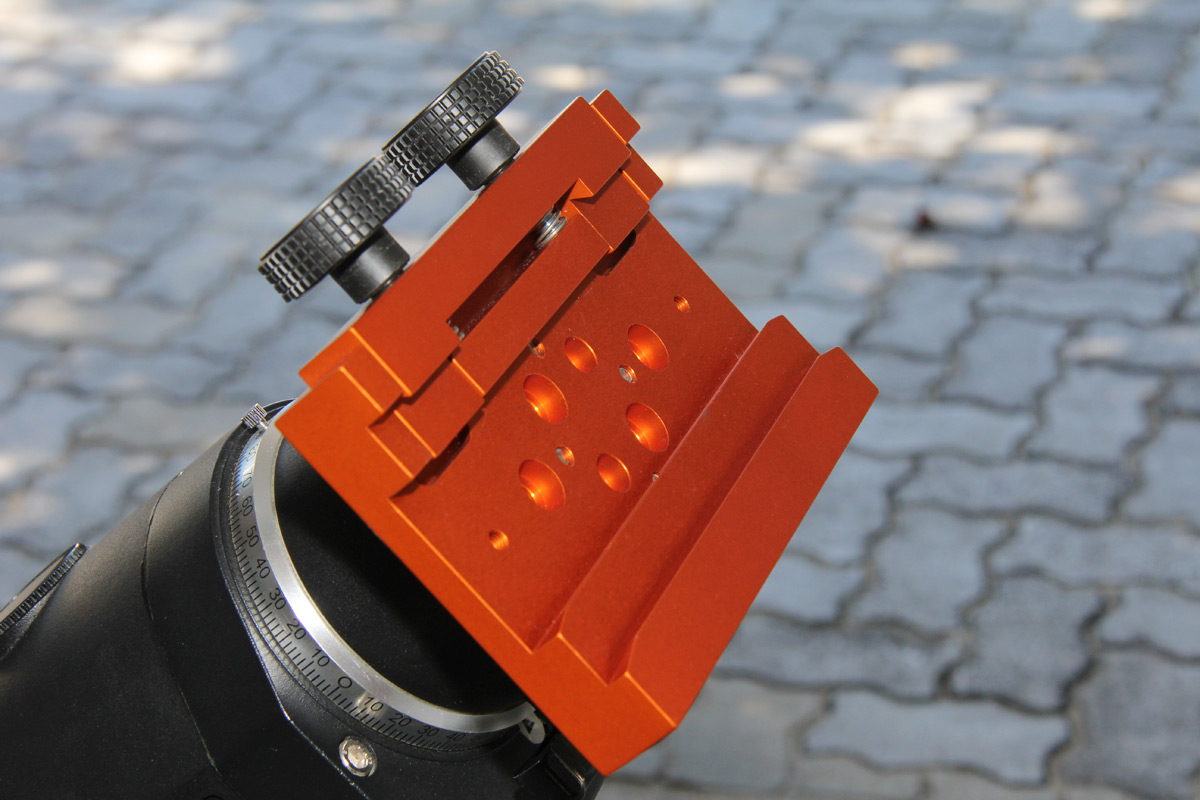 |
| Geoptik dove tail clamp for GP and Losmandy dovetails on the EQ6 |
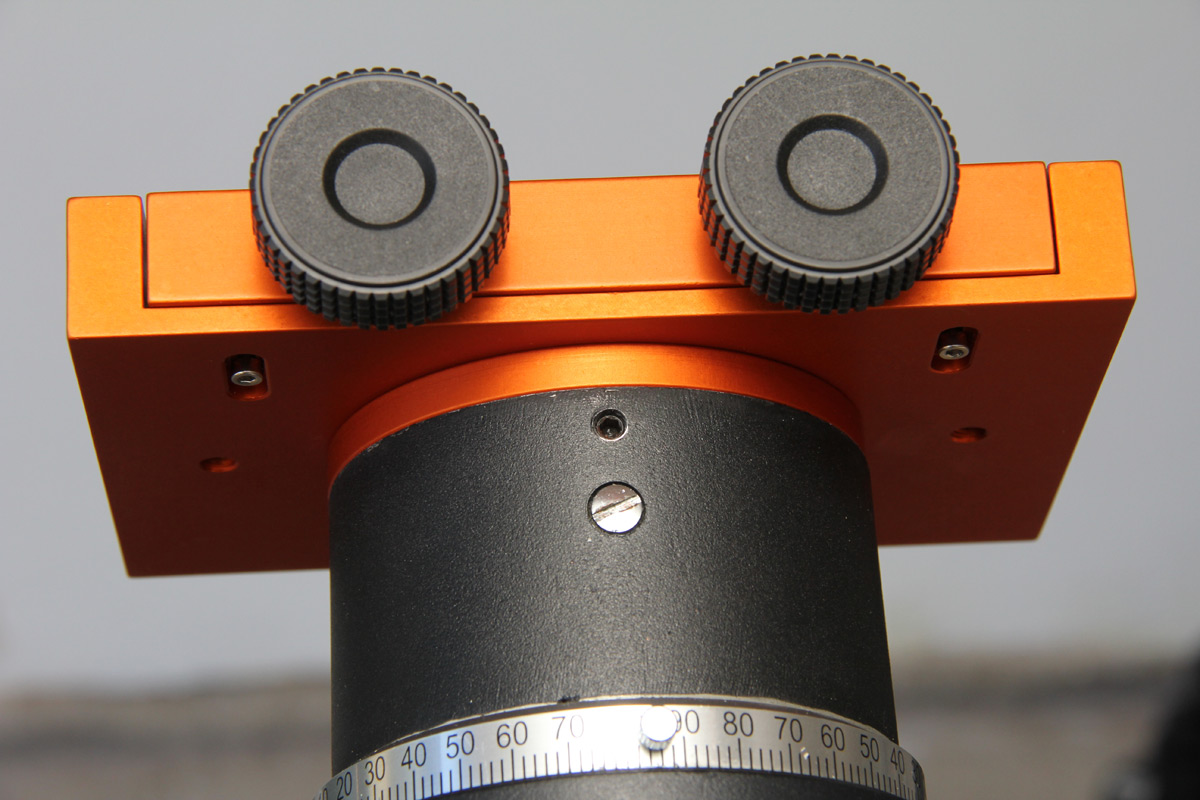 |
| Geoptik dove tail clamp for GP and Losmandy dovetails |
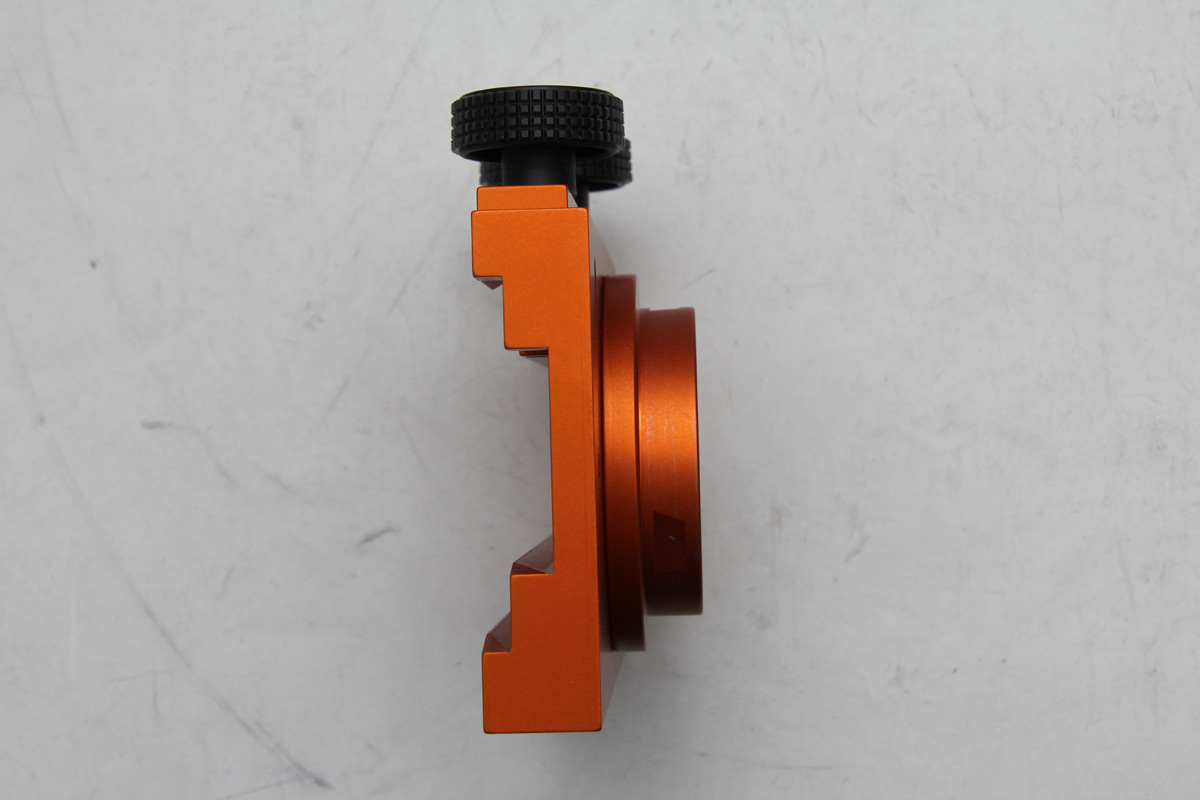 |
| Geoptik dove tail clamp for GP and Losmandy dovetails |
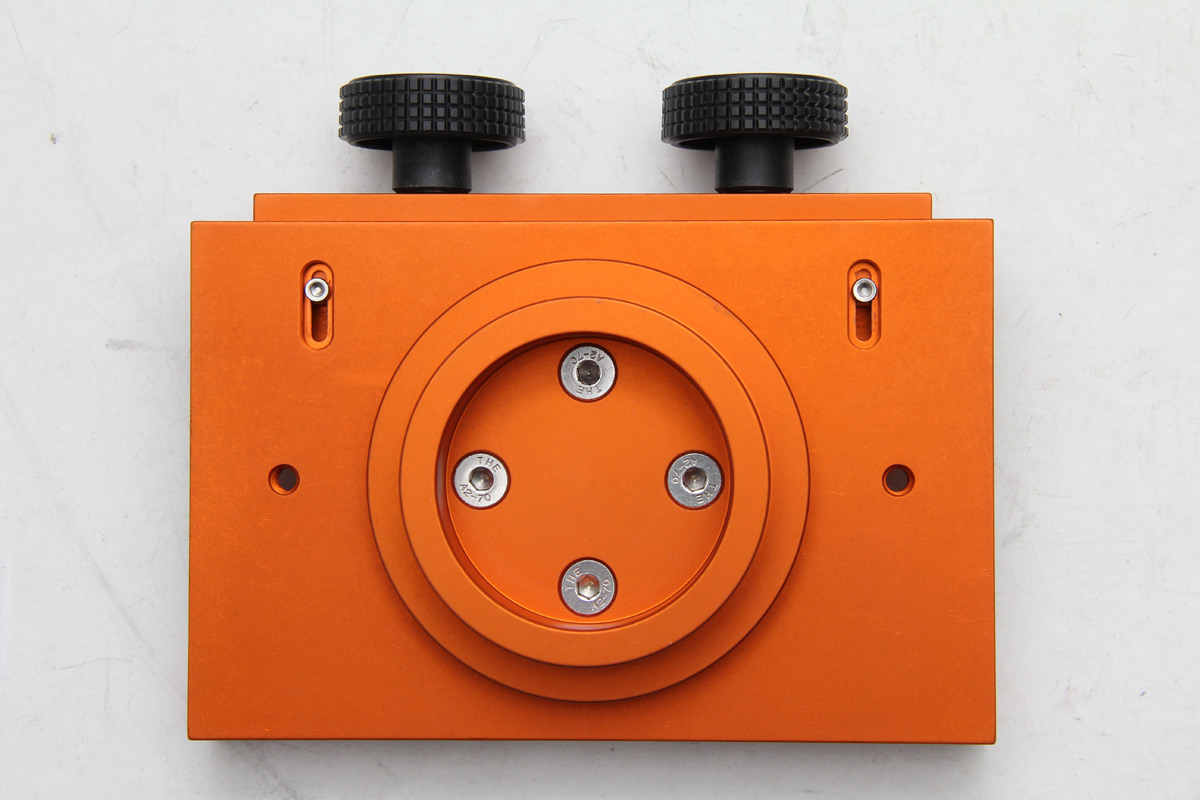 |
| Geoptik dove tail clamp for GP and Losmandy dovetails |
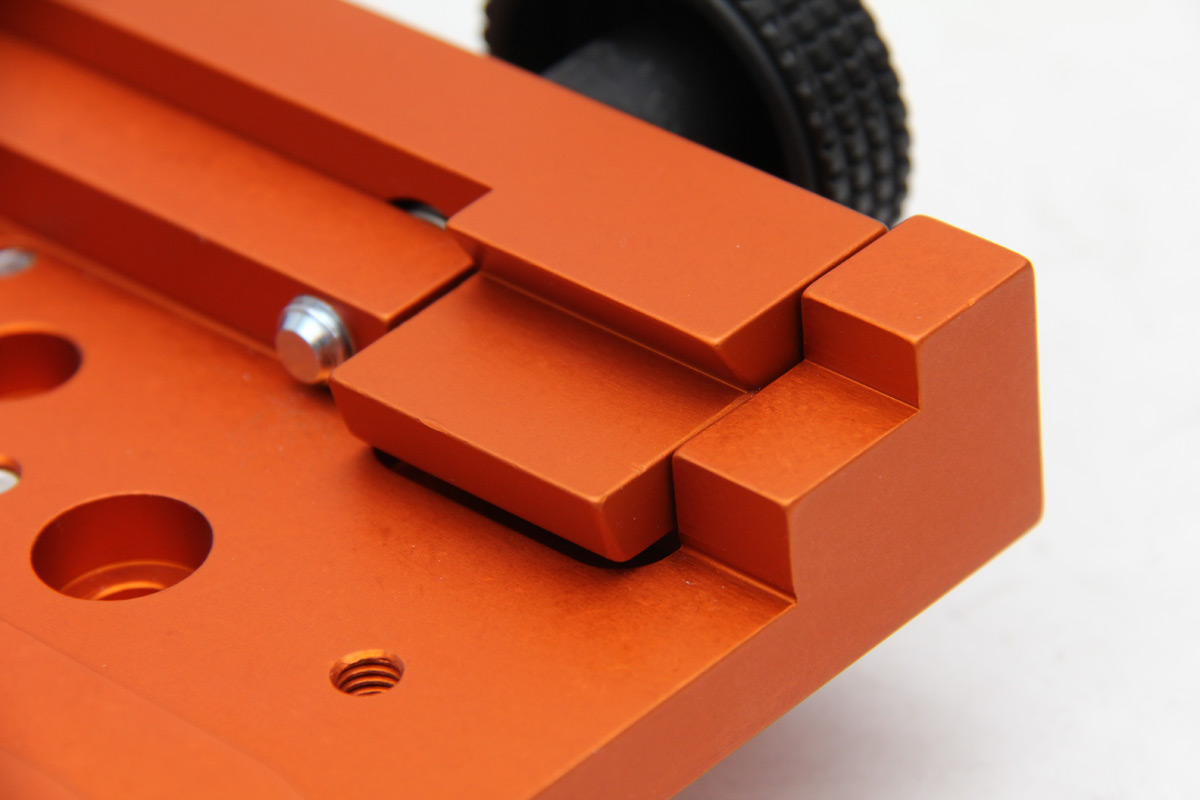 |
| GP dovetail on EQ6 |
 GP dovetail: Base 44mm, telescope side 70mm |
| Losmandy dovetail on EQ6 |
 Losmandy dovetail: Base 76mm, telescope side 105mm |
August 29, 2013 |
|
Site Home |