Parallactic mount Skywatcher EQ8
(since July 09, 2013)
| Frameless version of this page |
EQ8 Mount - Pages overview
Page #1 - History, decision and purchase of the Skywatcher EQ8 mount
Page #2 - Mobile setup of the EQ8 mount with Newton telescope (this page)
Page #3 - Current draw and power supply of the EQ8 mount
Page #4 - Detailed images of the EQ8 mount
Mobile setup with EQ8 mount and Newton telescope in Nonndorf - C47
EQ8 Mount - Pages overview
Page #1 - History, decision and purchase of the Skywatcher EQ8 mount
Page #2 - Mobile setup of the EQ8 mount with Newton telescope (this page)
Page #3 - Current draw and power supply of the EQ8 mount
Page #4 - Detailed images of the EQ8 mount
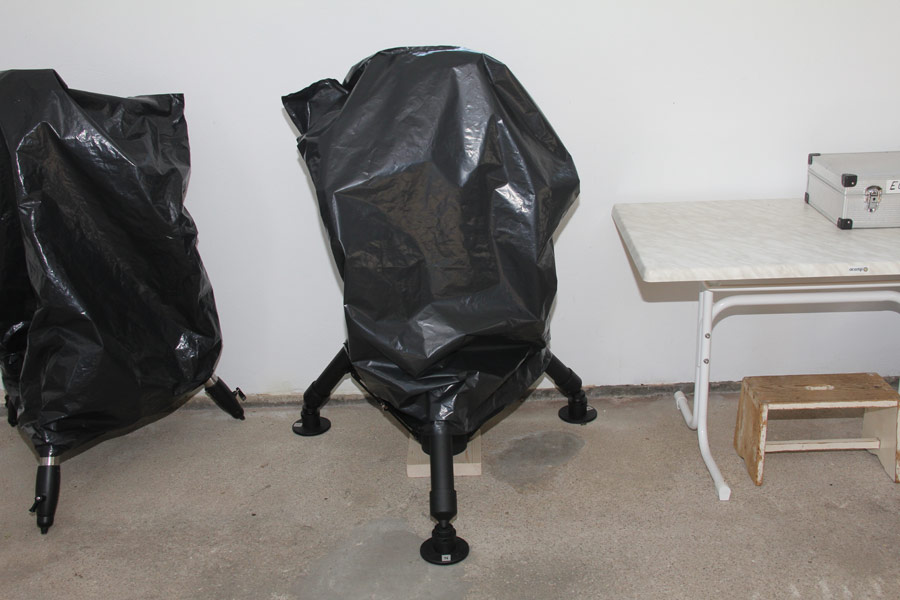
The mounts EQ6 and EQ8 standing in the garage under their protective cover. 
The well-tried EQ6 was equipped with a new Geoptik telescop clamp plate for GP and Losmandy racks. The EQ8 uses a telescop clamp for 3-inch wide Losmandy racks. And it is used with the original pol finder. The pol finder on the EQ8 is mounted permanent and is no problem when the mount head is carried. 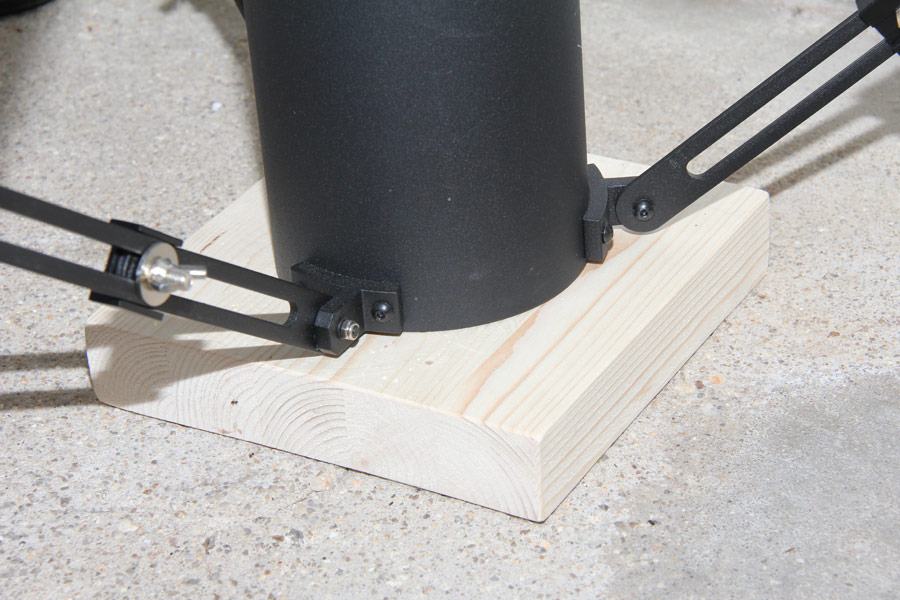
A wooden plate with 22 x 22 x 4.5cm is used as a base support for the center tripod tube when the level plates are removed later. At the lowest tripod height the length-adjustable supports of the tripod legs are assembled completely pulled apart. 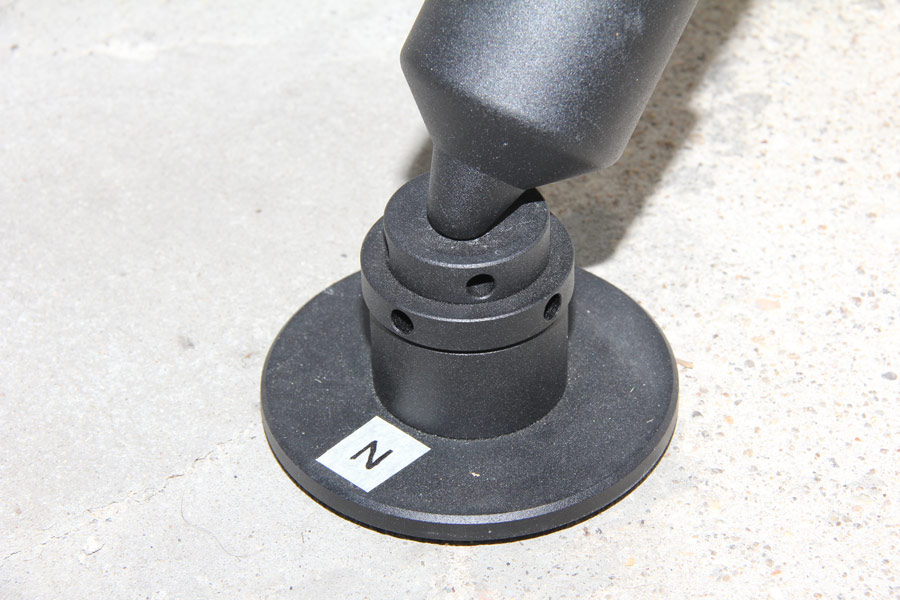
All three level plates for tripod legs N, E and W are already adjusted in their heights to level the mount horizontally on the setup location later. 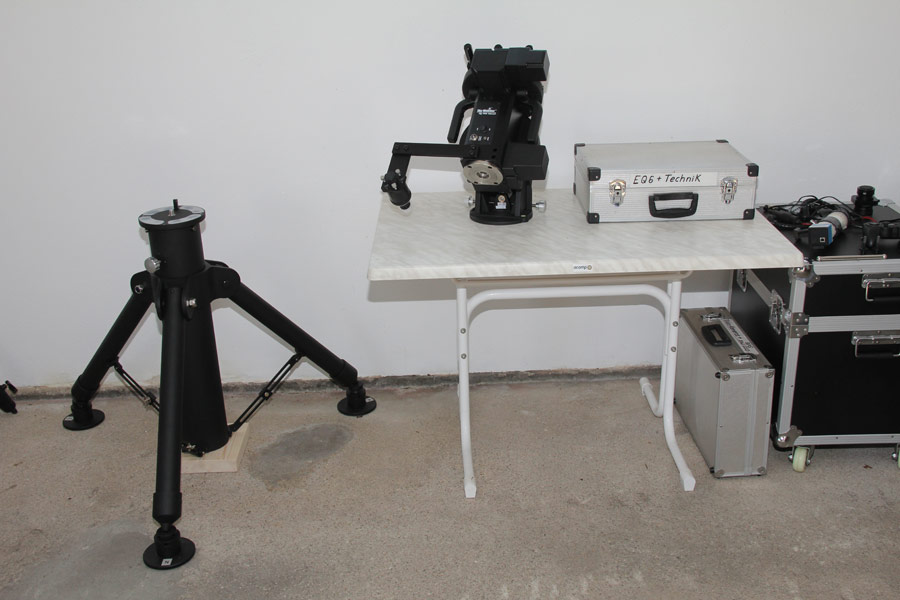
The 26kg head mount head is removed from the tripod and placed next to it in almost the same height on a table. The two handles on the mount head are particularly practical and make wearing easy and totally secure. On the tripod top, the four glued Teflon pads and the steel pin for the azimuth adjustment are visible. The counterpart, the bottom of mount head consists only of a flat steel surface with some holes.
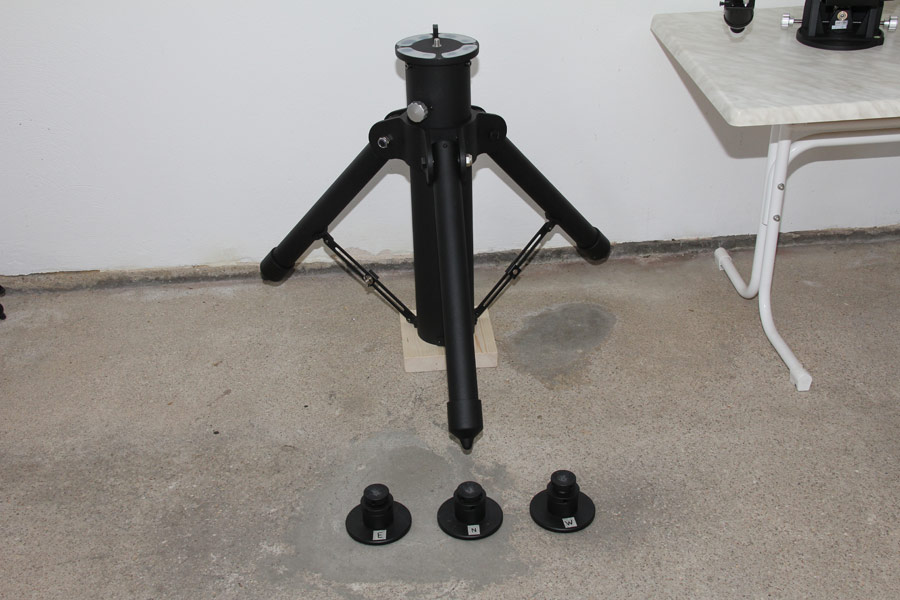
The tripod legs can be individually lifted a few millimeters, while the respective level plate below can be removed. The tripod now is standing sure on the center tube and the wooden plate. Because the tripod is adjusted to the minimum height of 76cm the tripod legs are not reaching the ground. The maximum tripod height would be 110cm. 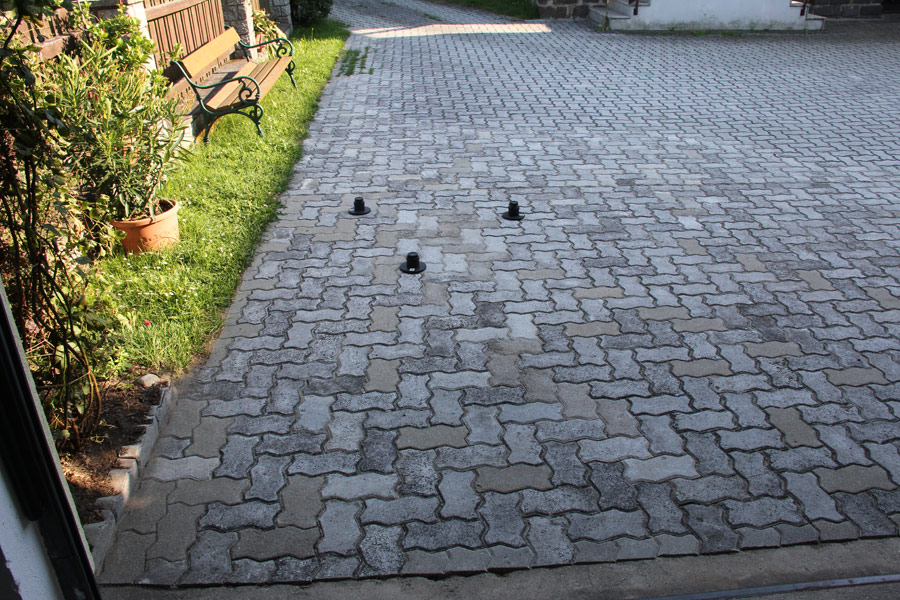
The three level plates weigh 5.5kg and are placed on labeled position on the ground in front of the garage. Because of this a raw orientation of the mount to the pole is made. Each plate level is already set to the correct height to align the tripod exactly horizontal later. 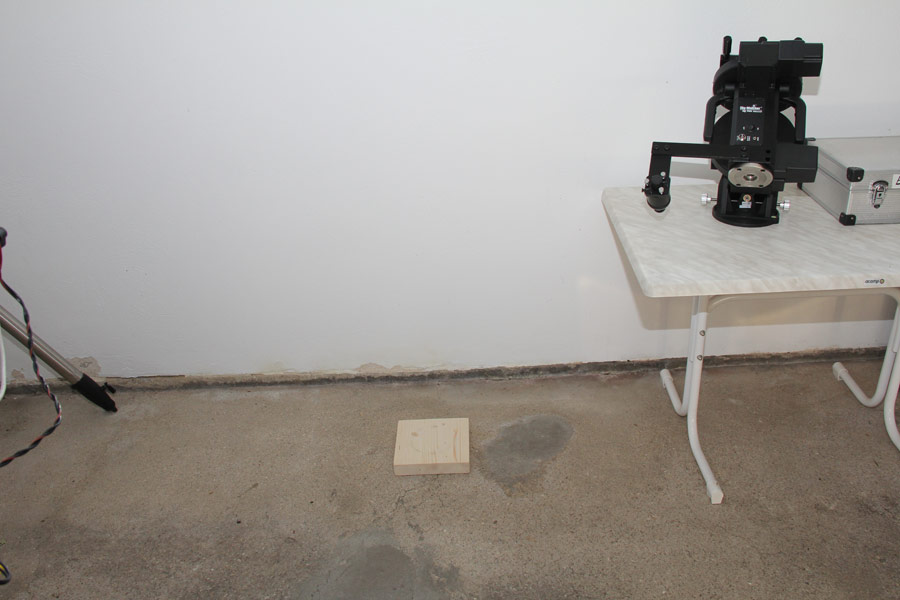
The tripod weigh 28.8 kg and will be carried from the wooden plate in the garage to the setup location. 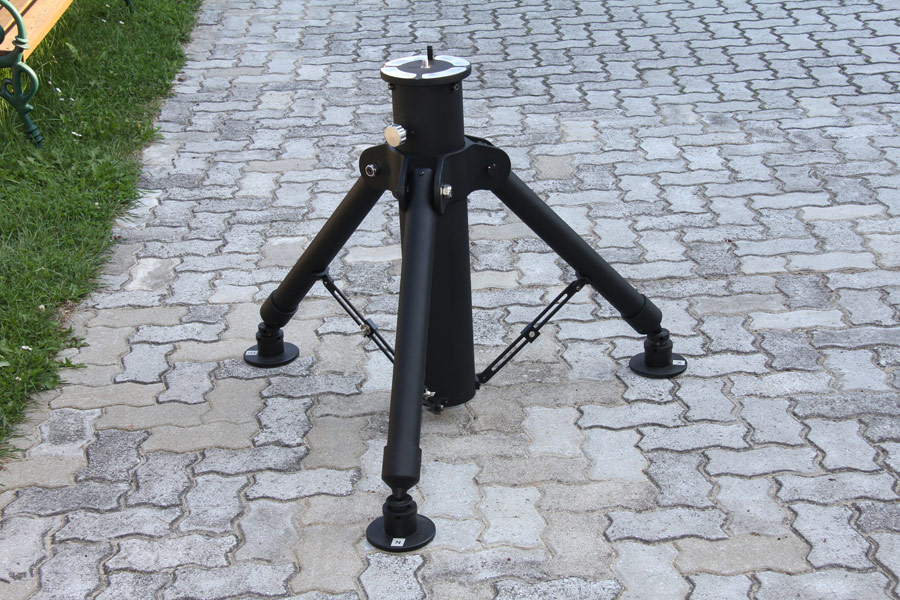
Because of the previous positioning of the level plates on the groung lables the tripod fits exactly on the level plates now. 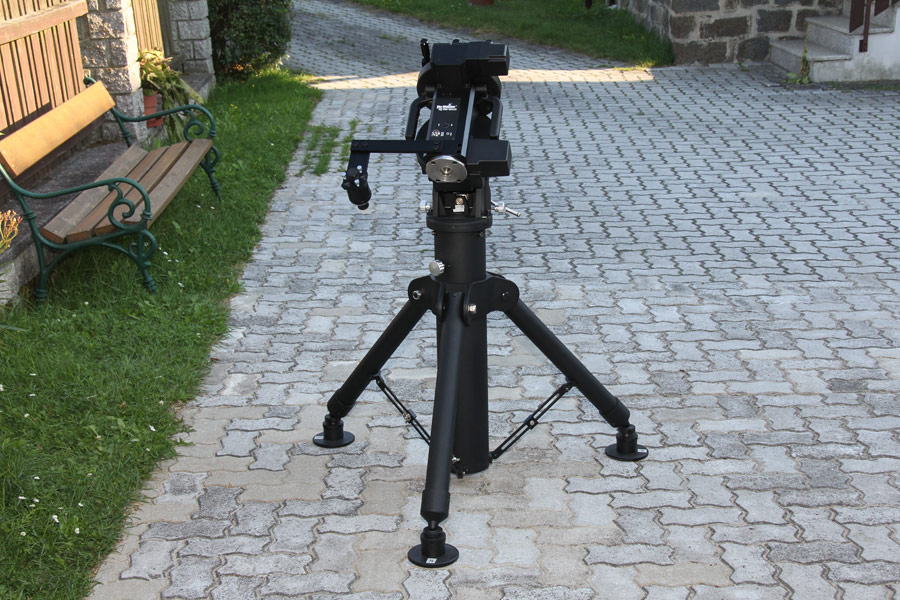
The mount head will be carried now from the table in the garage to the tripod and attached. The fixing is made with a central spring-loaded M12 screw with a bevel gear wheel redirection and with two allen head screws on the outside. Because of the preset level plates the mount is now standing leveled and oriented raw to the pole. 
The solid stainless steel counterweight rod with a length of 40cm and a diameter of 31.4mm weighs 2.6kg and is screwed in on the mount head now. On the counterweight rod a label with a tape is placed to make a fast right positioning of the counterweights possible. 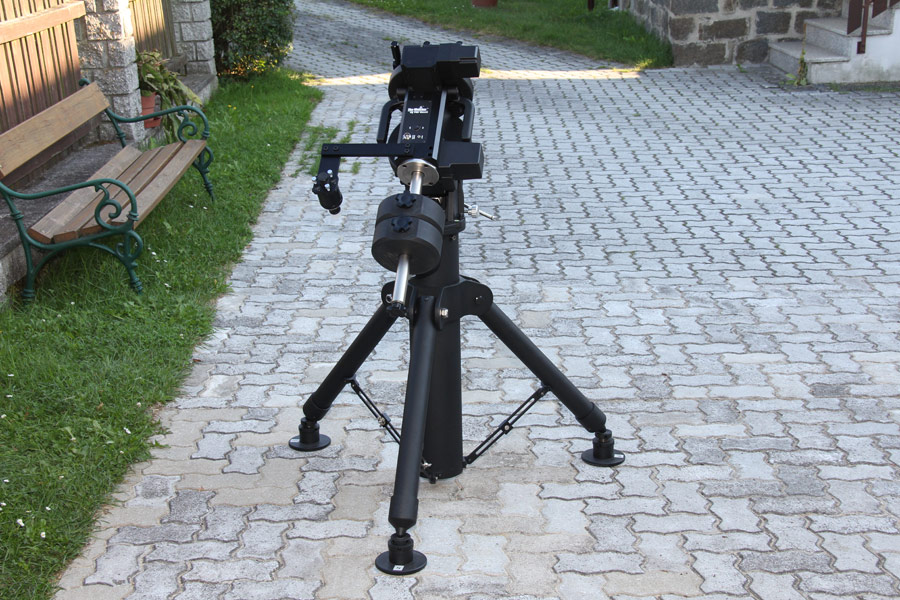
With the screwing of the two counterweights with 2 x 10kg actually the mount setup is finished. The mount with two counterweights weihgs 82.9kg in total. 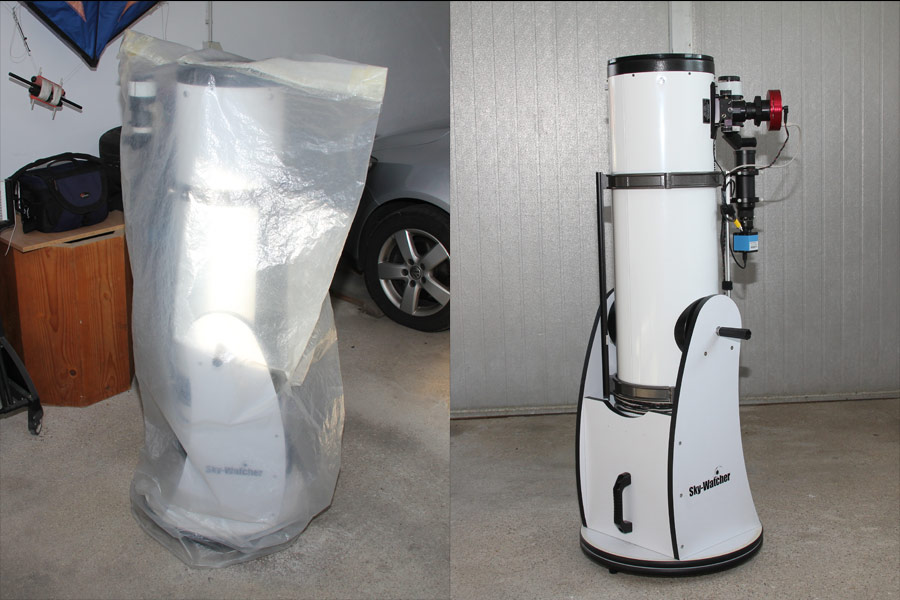
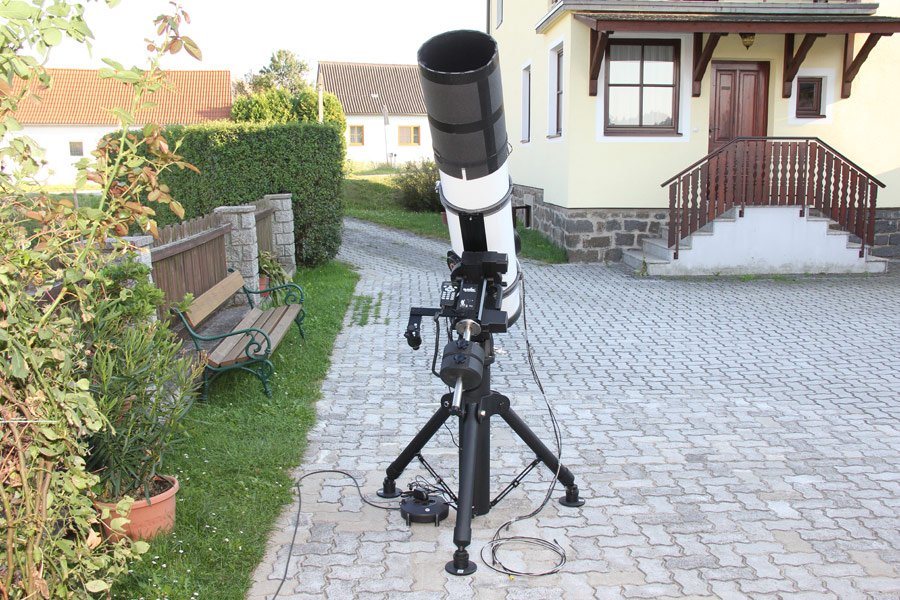
The Newton telescope was adapted from a Dobson telescope. But this 10-inch Newton telescope purchased in the year 2003 can be further used as a Dobson or screwed on my mounts EQ6 and EQ8. A new 3 inches wide Losmandy rack with a length of 610mm is a solid base now for the mounting on the parallactic Goto mounts. 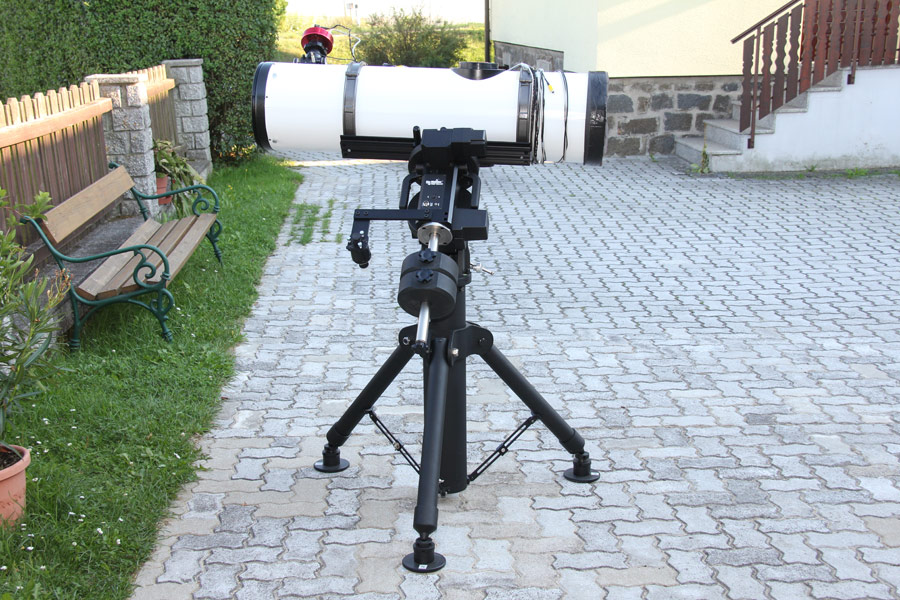
With all additional parts assembled the tube of the 10 inch telescopes weighs 18kg and can be mounted in a leveled position on the EQ8 without problems. The mounting heigh at a latitude of 49 degrees is 115cm and actually is one centimeter lower as on the EQ6. A flat Alu bar with 5x40x610mm opposite of the Losmandy rack is used as a reinforcer and as an additional help for hold and carry of the telescope. The guiding system is also mounted on this Alu bar. The OTA of the 1200/254mm F/4.72 Newton has a length of 113cm and a diameter of 31cm. 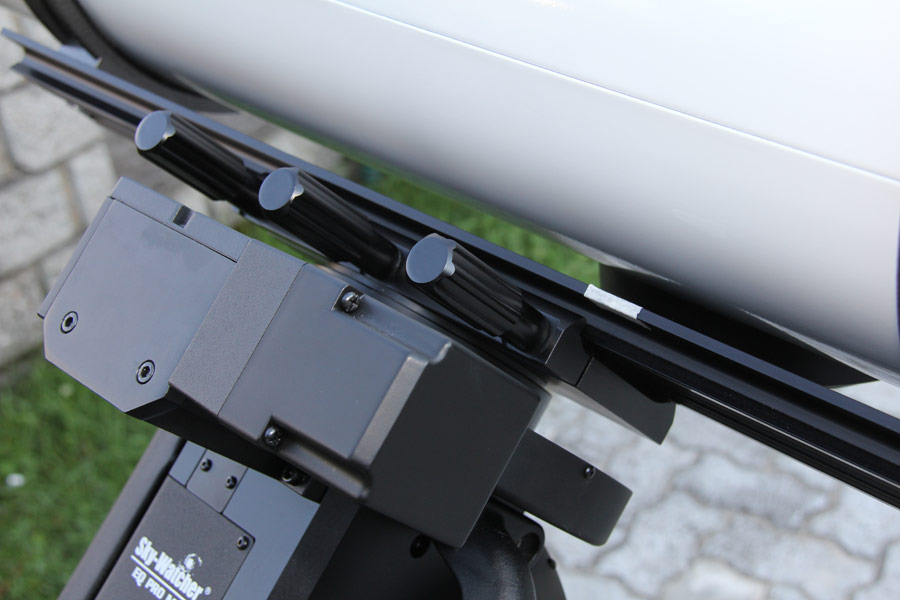
A label with a tape on the 3-inch Losmandy rack helps to find fast the right mounting position of the telescope. 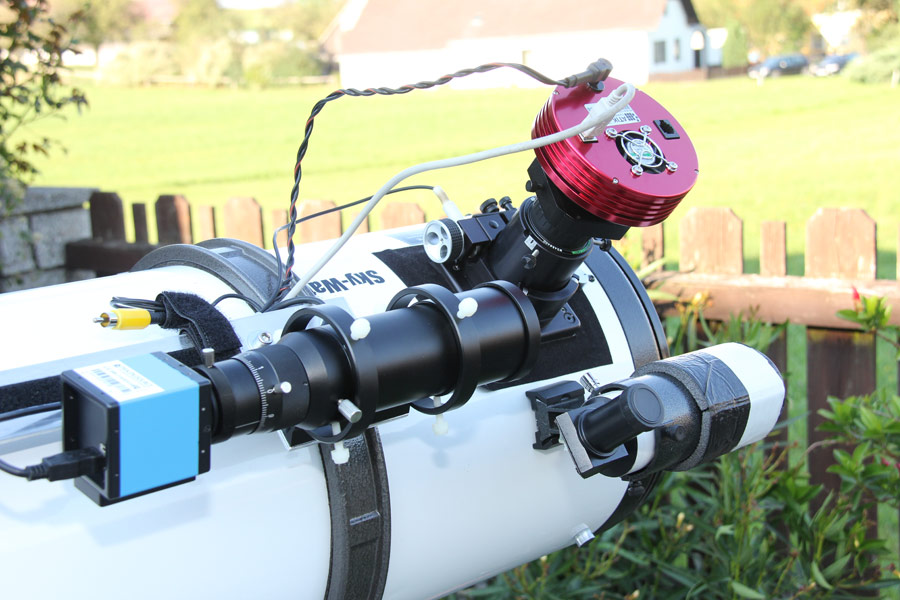
A JMI NGF-DX1 eye piece holder with motor focus and cable control, a Baader MPCC Coma corrector, a filter slider and an Atik 314L+ B/W CCD camera is mounted on the Newton. For the first mount alignment on reference stars a 50mm angle finder with selfmade graticule illumination is helpful. For the guiding system a 180/50mm optic with mounted B/W DMK 21AU04.AS camera is used. 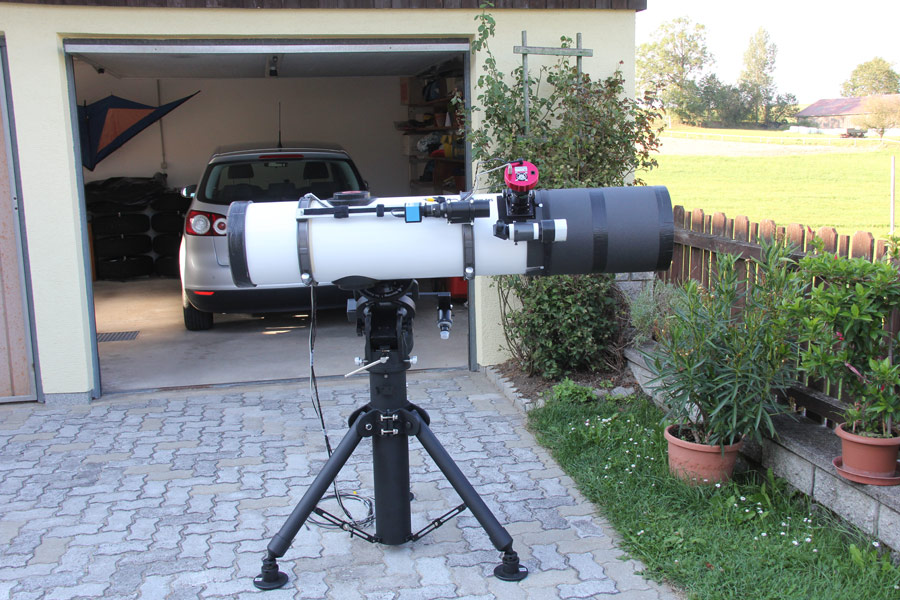
The cabling is combined in a spiral coiled tube an is routed to the power supplies and notebook. A dew and a light protection cap made from a camping mat like material is mounted in front with the help of notches. So the dewing of the secondary mirror can be prevented even in extreme conditions. The total system of mount and telescope weighs now 101kg. 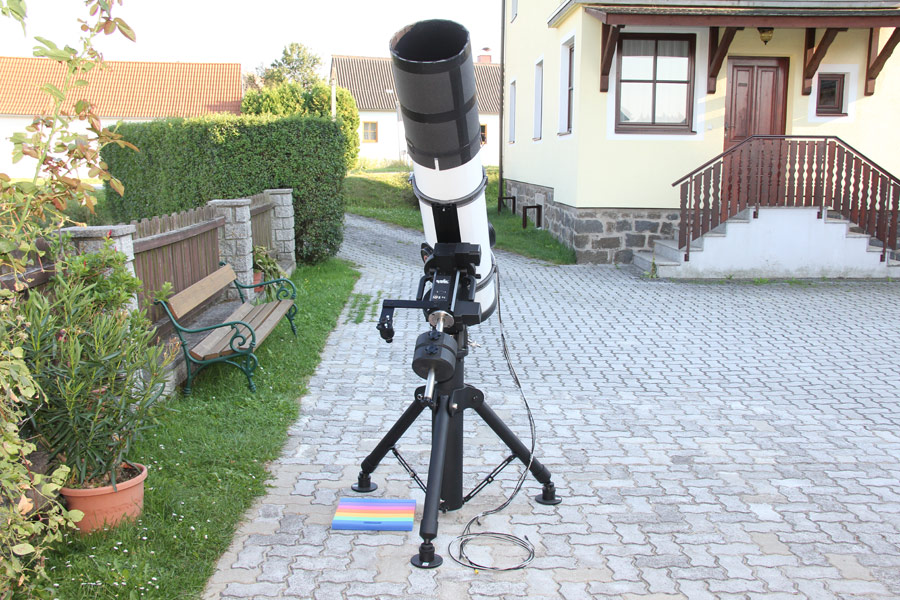
With the beginning of civil twilight Polaris becames visible and the mount can be aligned to the celestial pole with the pole finder. This procedure can be finished within one minute. Due to the low viewing position a foam material pad can be useful. Possible small aberrations from the pole axis will be hold below the seeing limit by the guiding later.
Beside the garage the power supply of the mount and the cameras is made by the 230V power grid and 12V switching power supplies. In open area the system supply is made by a 12VDC/230VAC converter supplied directly from the car battery. 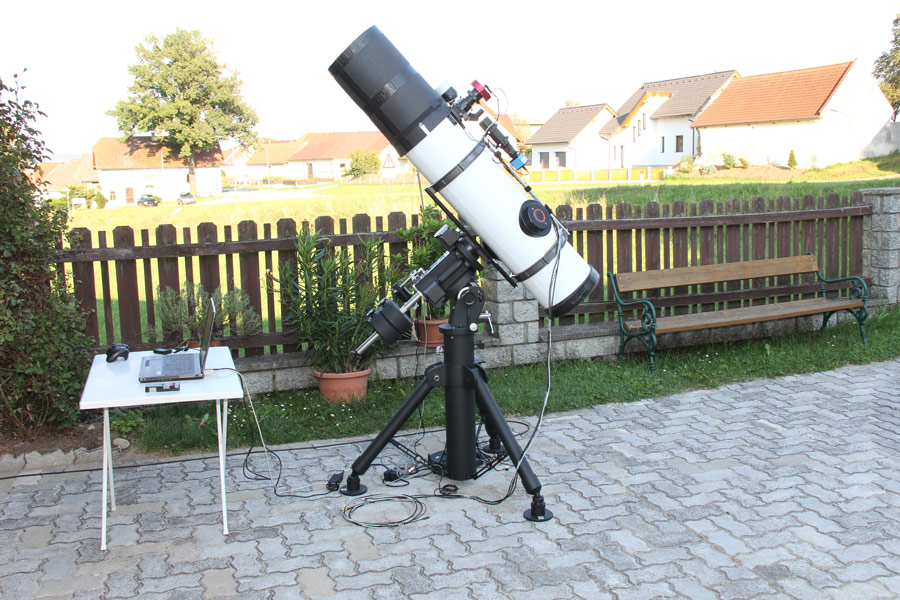
With the notebook the mount and cameras are controlled and images from the CCD camera are stored on it. The notebook can be operated directly on the mount place or over WLAN and software TeamViewer using the office PC inside the house. The HP ProBook 6570b with core i5 processor and W7P/64bit operating system has 5 USB interfaces and one real serial hardware interface. This COM1 interface is used for mount control with Guide9 and EQMOD ASCOM. And the five USB interfaces offer enough possibilities for controlling cameras or other hardware. 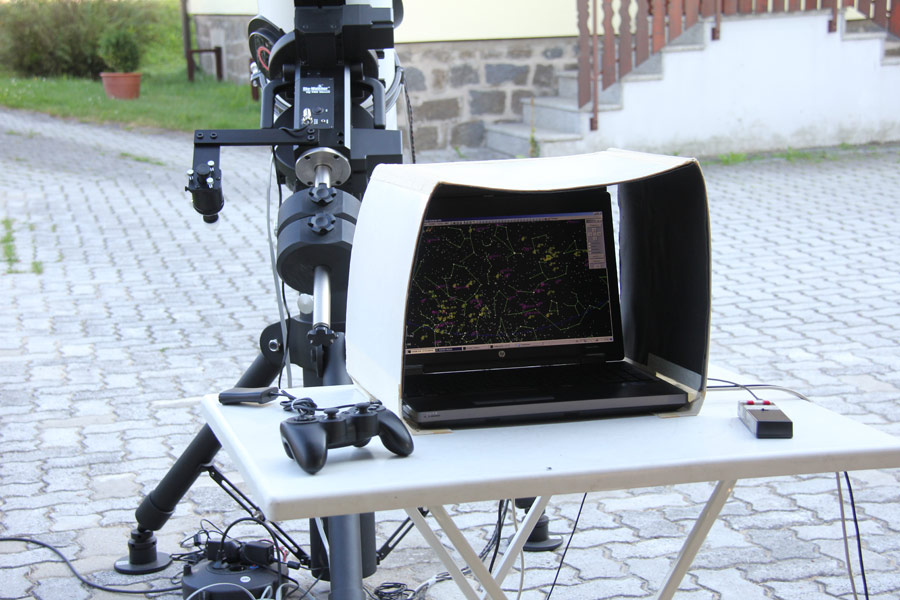
A carton protection cover surely prevents the notebook display from beeing damaged by very low temperatures. In northern Woodquarter region of Austria about -20 degree Celsius are no rarity in winter. Guide 9 and EQMOD ASCOM are excellent to control my mounts EQ6 and EQ8. The simultaneously control of the EQ6 and the EQ8 would be possible with the EQMOD version for two instances too. EQMOD can operate with additional input devices like a gamepad. The wireless control of the mount with a gamepad is a big advantage during alignment or observation. For long exposure images the mount guiding will be also controlled by EQMOD ASCOM and the software Guidemaster. 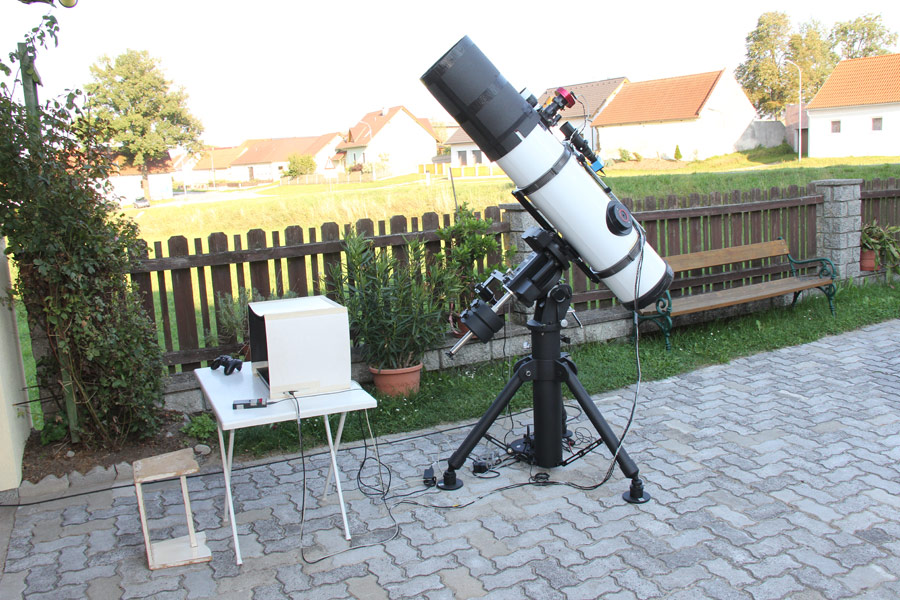
The total setup time of the equipment beside the garage is about 15 minutes. After that the alignment of the mount on reference stars can start. If the focus of the CCD camera was adjusted the first images can be exposured about 30 - 40 minutes after setup start. Of course, precondition is a well temperature acclimatization of the Newton telescope. The time for disassembly of the whole setup is also about 15 minutes. 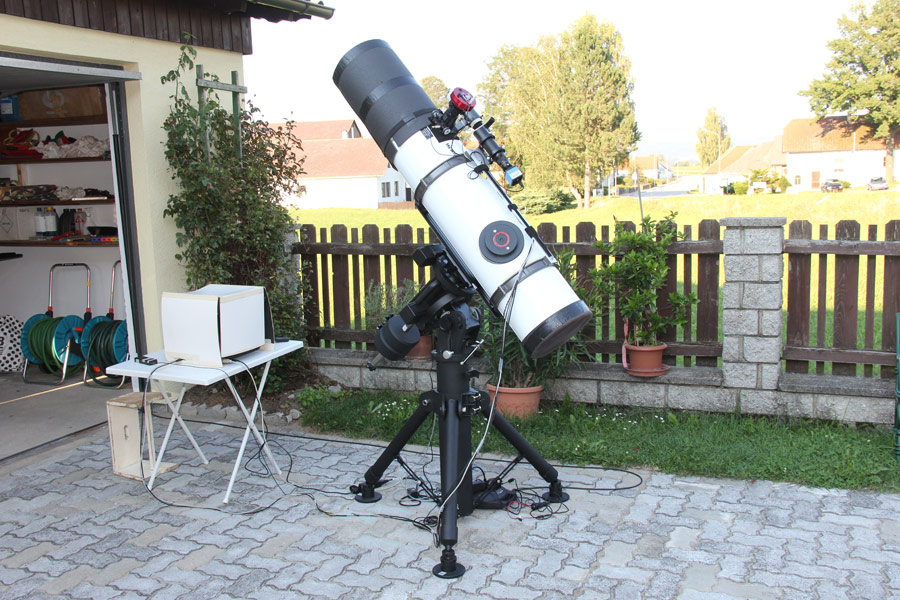
View of the complete assembling from the west. 
View of the complete assembling from the south. 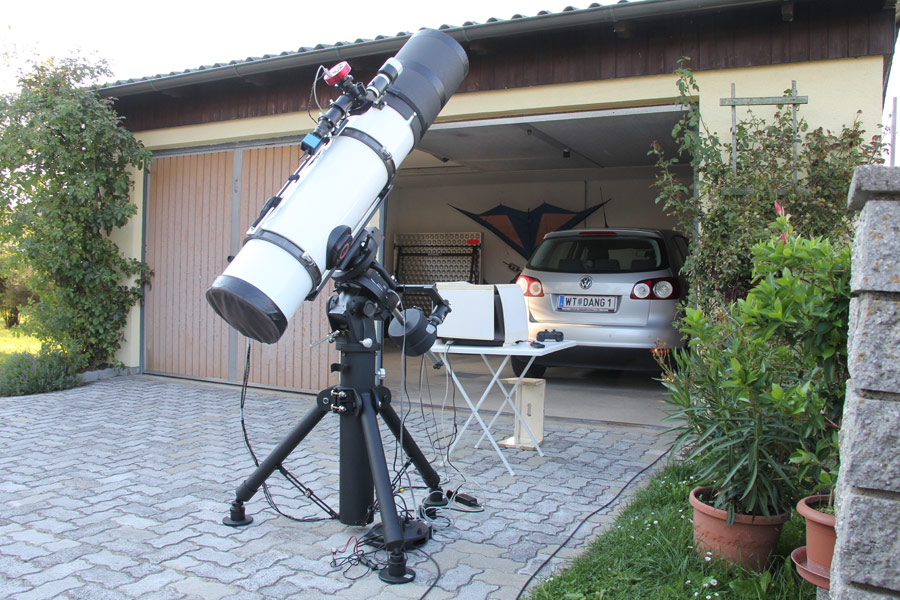
View of the complete assembling from the southeast. 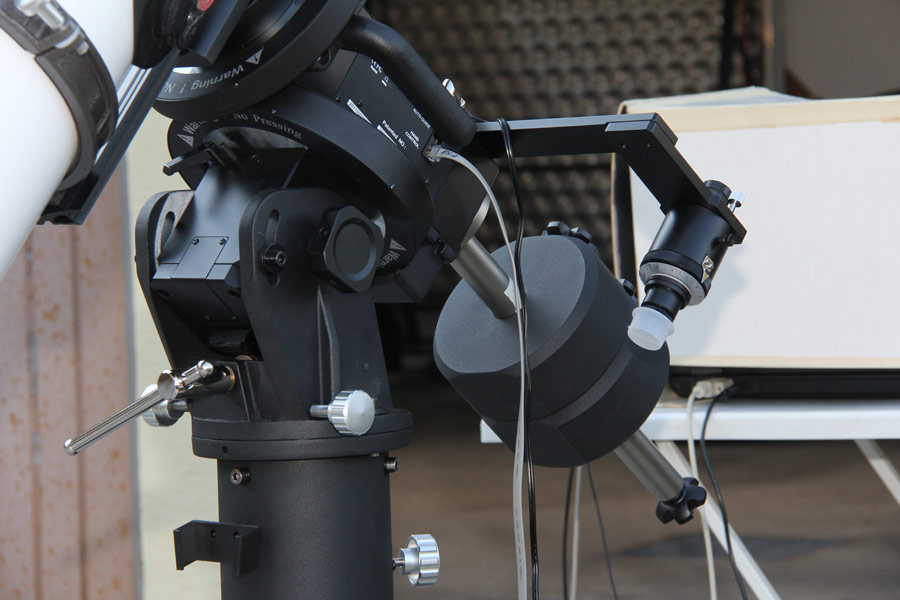
The Mount head with cables for 12V DC supply and EQMOD control. 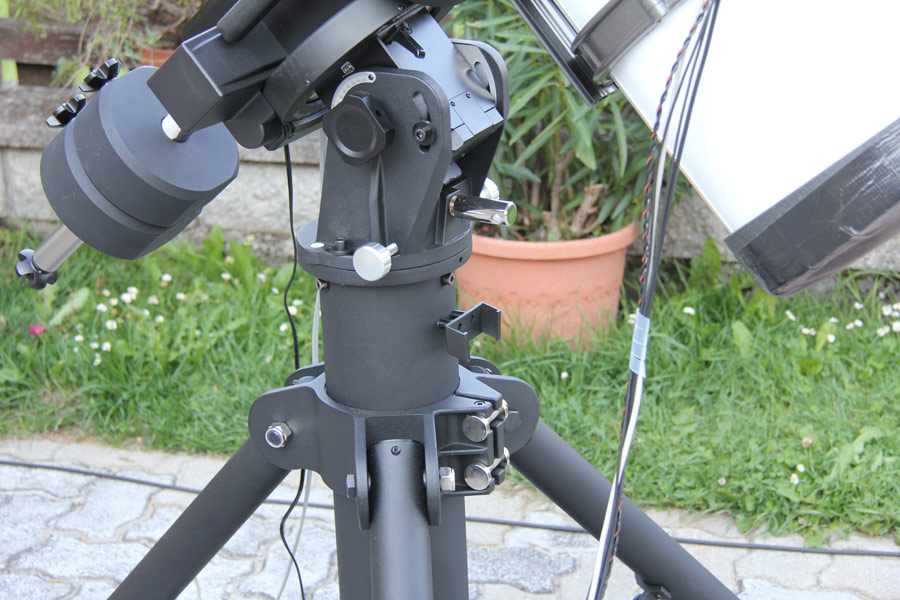
The rod for height adjustment of the pole axis can be removed to prevent a hook of the cables. But this would not be possible in any case with the long Newton telescope. And a height adjustment of the pole axis is not necessary on the fixed location beside the garage. 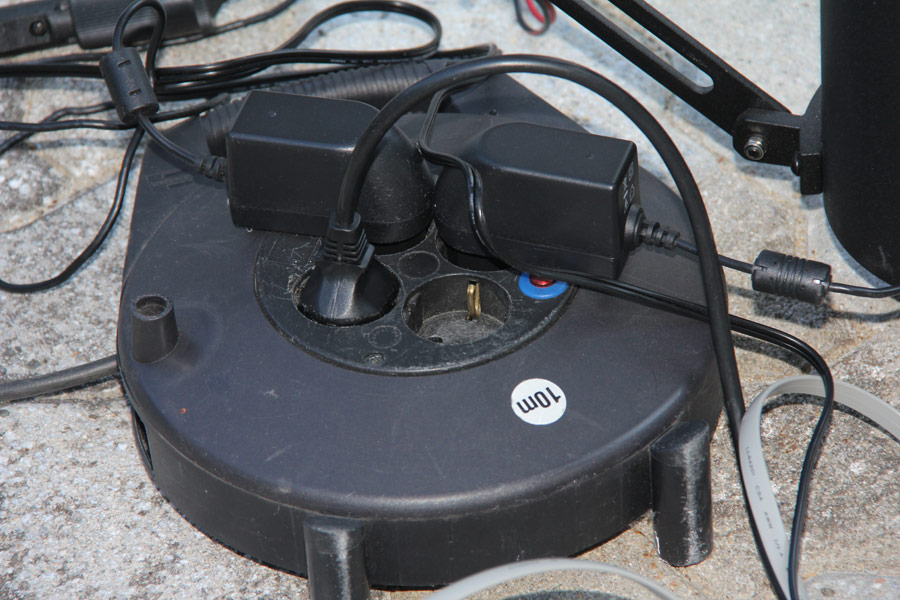
For operating without any problems a relative cheap 12V/2A switching power supply with 24W capacitiy is sufficient. The same power supply is used for cooled B/W CCD camera Atik314L+. And the EQ6 mount is also supplied with it. 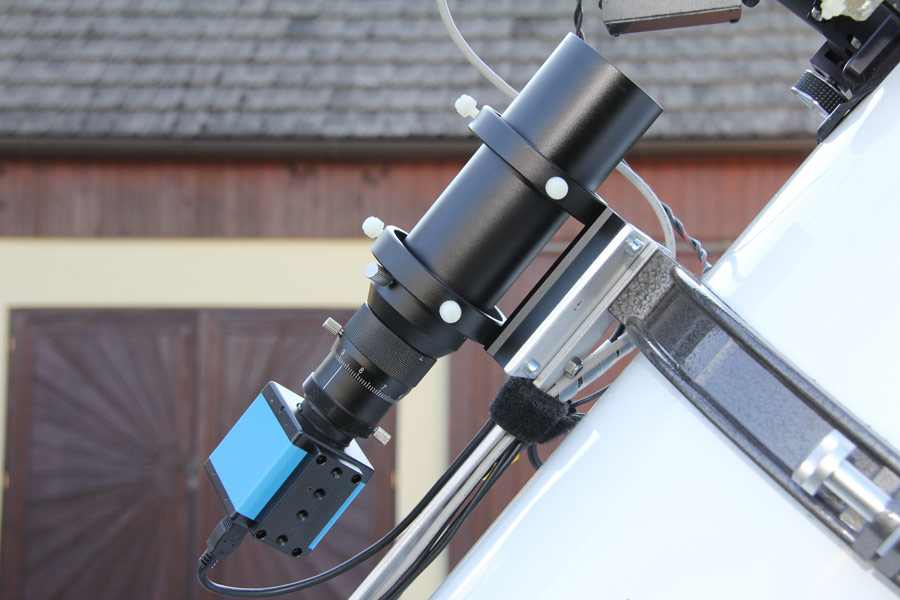
The small 180/50mm guiding telescope with B/W camera DMK 21AU04.AS can guide the Newton telescope with focal length of 1200mm on the EQ8 below one arcsecond RMS offset. 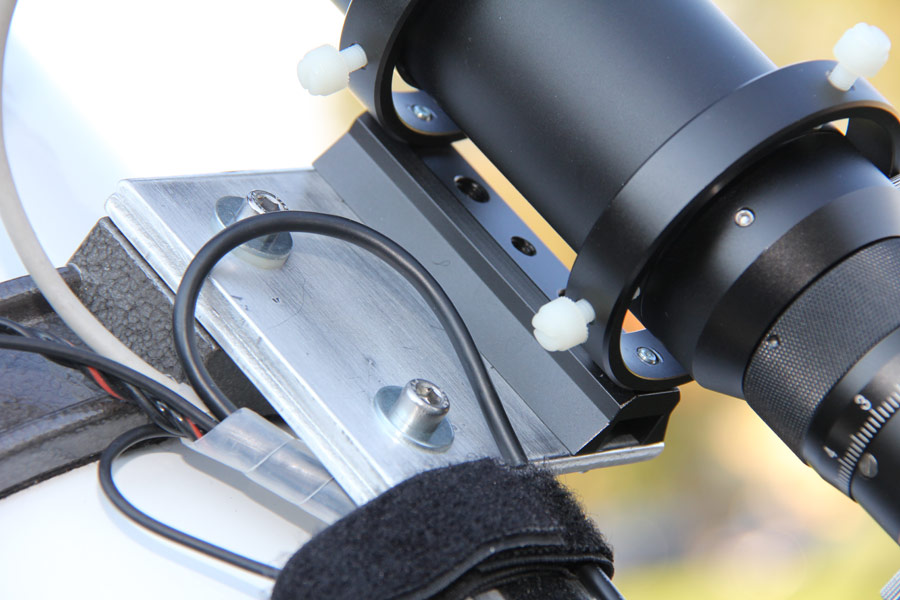
The mounting of the guiding system on the 5mm Alu rack is made with a 5mm Alu plate. In the meantime the six Nylon screws were replaced by stainless stell screws because of better stability. 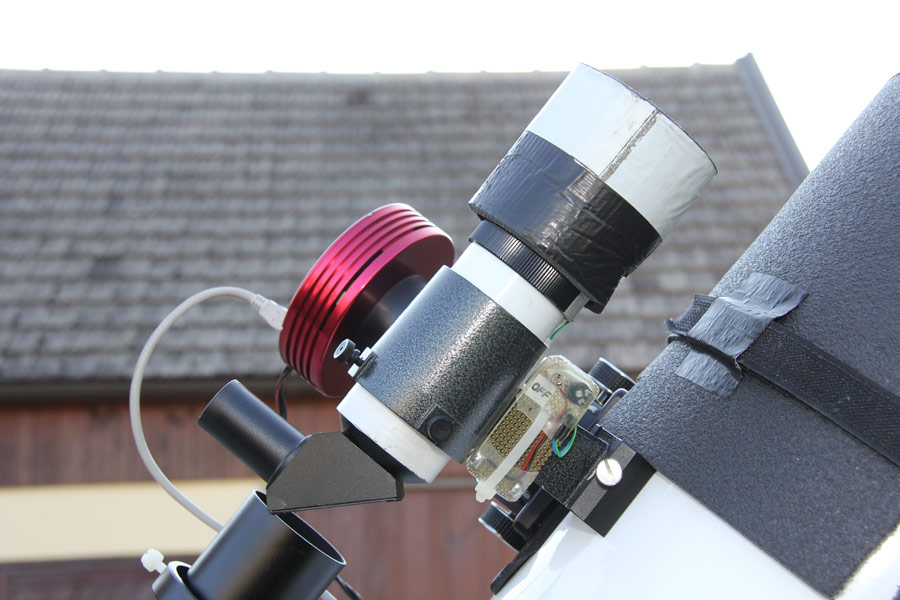
The 50mm angle finder has a selfmade graticule illumination and a moveable dew cap. 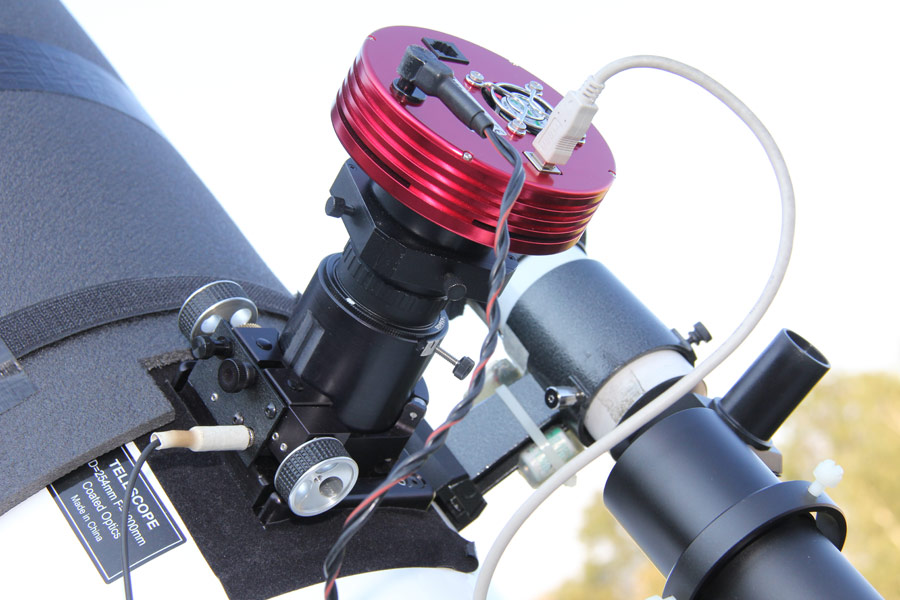
The cooled B/W CCD camera Atik314L+ with low read out noise and short download times is ideal for scientifically oriented images.
Top of page
October 07, 2013
![]() Questions and suggestions to => Gerhard Dangl
Questions and suggestions to => Gerhard DanglSite Home